
Guía del jugadorPlayer guide
Todo lo que necesitas saber para ganar. Las cifras salen de los datos reales del juego (versión 0.1).Everything you need to win. Figures come from the game's real data (version 0.1).
Sin resultados. Prueba con otra palabra.No results. Try another word.
 Objetivo del juegoGoal of the game
AstraGrid es una batalla espacial por turnos contra la IA. Tú y el enemigo ocultáis una flota en vuestro tablero y os disparáis por turnos. Gana quien destruye primero toda la flota rival.
Victoria
Ganas el sector cuando todas las casillas de la flota enemiga están destruidas: su barra de HP llega a 0.
- No hace falta hundirlas «una a una»: lo que cuenta es vaciar la barra.
- Cada victoria paga créditos; también hay extras por salud de la flota, objetivos y rachas.
Derrota
Pierdes cuando todas tus casillas están destruidas: tu barra de HP llega a 0. Vuelves al hangar y puedes reintentar el sector.
- Cada reintento trae una flota enemiga nueva: no sirve memorizar su posición.
- Las armas gastadas en el intento perdido no se recuperan.
AstraGrid is a turn-based space battle against the AI. You and the enemy each hide a fleet on your own board and take turns firing. Whoever destroys the whole enemy fleet first wins.
Victory
You win the sector when every square of the enemy fleet is destroyed: its HP bar reaches 0.
- You don't need to sink them «one by one»: what counts is emptying the bar.
- Every victory pays credits; there are extras for fleet health, objectives and streaks.
Defeat
You lose when every one of your squares is destroyed: your HP bar reaches 0. You return to the hangar and can retry the sector.
- Each retry brings a brand-new enemy fleet: memorizing positions won't help.
- Weapons spent in the lost attempt are not refunded.
 Tu primer combateYour first battle
Astra Grid es una batalla espacial por turnos. Tú y el enemigo ocultáis una flota en vuestro tablero y os disparáis por turnos; gana quien destruye primero toda la flota rival.
No ves la flota enemiga: tienes que encontrarla. Cada disparo te cuenta algo: vacío, impacto o nave derribada.
- Despliega tu flota en el tablero: arrastra cada nave o pulsa «Auto».
- Elige la nave que dispara y el arma. El disparo normal es gratis e ilimitado.
- Toca una casilla del campo enemigo y confirma el disparo.
- Mira el resultado: vacío, impacto o destruida. Después responde el enemigo.
- Repite hasta que una de las dos flotas quede destruida.
Astra Grid is a turn-based space battle. You and the enemy each hide a fleet on your own board and take turns firing; whoever destroys the whole enemy fleet first wins.
You can't see the enemy fleet: you have to find it. Every shot tells you something: void, hit or shot down.
- Deploy your fleet on the board: drag each ship or press «Auto».
- Pick the ship that fires and the weapon. The normal shot is free and unlimited.
- Tap a square on the enemy field and confirm the shot.
- Check the result: void, hit or destroyed. Then the enemy answers.
- Repeat until one of the two fleets is destroyed.
 TurnosTurns
Un turno tuyo tiene tres momentos: elegir, apuntar y ver el resultado. Solo disparas una vez por turno (con una excepción: el Interceptor).
Si ninguna nave puede disparar (todas recargando), el botón de ataque pasa a «Pasar turno».
- Recarga: al empezar tu turno, tus naves recuperan carga si les toca.
- Elige una nave con carga y el arma que lleva.
- Pulsa Atacar: la cámara pasa al campo enemigo. Toca la casilla objetivo.
- Confirma. Verás el proyectil, el impacto y el aviso del arma usada.
- Responde el enemigo sobre tu campo y vuelve el turno a ti.
Your turn has three moments: choose, aim and see the result. You only fire once per turn (with one exception: the Interceptor).
If no ship can fire (all recharging), the attack button becomes «End turn».
- Recharge: at the start of your turn, your ships regain a charge if it's due.
- Pick a ship with a charge and the weapon it carries.
- Press Attack: the camera moves to the enemy field. Tap the target square.
- Confirm. You'll see the projectile, the impact and the notice of the weapon used.
- The enemy answers on your field and the turn returns to you.
 Daño y propagaciónDamage and spread
El daño es determinista, sin críticos ni azar:
- daño del disparo = daño base de la nave × multiplicador del arma.
- El azar está solo en la búsqueda (dónde están las naves).
Cada casilla de nave tiene su propio HP. El disparo se resta de la casilla objetivo; si la deja a 0, el sobrante se propaga por las casillas vivas de la misma nave.
- El disparo resta su daño a la casilla objetivo. Lo que sobra de HP no se acumula.
- Si la casilla llega a 0, queda destruida y el sobrante («onda») viaja por la misma nave.
- Casilla en un extremo o con un solo vecino vivo: todo el sobrante pasa a ese vecino.
- Casilla interior con dos vecinos vivos: el sobrante se reparte 50/50; los restos impares se pierden.
- Cada salto siguiente divide entre 2 y se saltan las casillas ya destruidas.
| Nave | Arma | Cálculo | Daño |
|---|---|---|---|
| Corbeta | Disparo normal | 1 × 1 | 1 |
| Fragata | Misil | 2 × 2 | 4 |
| Crucero | Bomba | 3 × 3 | 9 |
| Acorazado | Misil | 5 × 2 | 10 |
Damage is deterministic, with no crits or luck:
- shot damage = the ship's base damage × the weapon multiplier.
- Luck lives only in the search (where the ships are).
Every ship square has its own HP. The shot is subtracted from the target square; if that drops it to 0, the excess spreads to the living squares of the same ship.
- The shot subtracts its damage from the target square. Leftover HP doesn't carry over.
- If the square reaches 0 it is destroyed and the excess («wave») travels along the same ship.
- Square at an end or with one living neighbour: all the excess goes to that neighbour.
- Inner square with two living neighbours: the excess splits 50/50; odd remainders are lost.
- Each further hop halves it, and already destroyed squares are skipped.
| Ship | Weapon | Calculation | Damage |
|---|---|---|---|
| Corvette | Normal shot | 1 × 1 | 1 |
| Frigate | Missile | 2 × 2 | 4 |
| Cruiser | Bomb | 3 × 3 | 9 |
| Battleship | Missile | 5 × 2 | 10 |
 Recarga y cargasRecharge and charges
Las naves pequeñas disparan siempre. Las grandes tienen cargas y un tiempo de recarga:
- Disparar gasta 1 carga y arranca el temporizador de recarga.
- Al inicio de CADA turno tuyo el temporizador baja 1; al llegar a 0 recuperas una carga.
- Una nave dañada recarga igual; solo se detiene si se hunde.
Cada tarjeta de nave (en Tablero y naves) muestra sus cargas y su recarga.
| Turno | Acorazado | Crucero | Fragata | Dispara |
|---|---|---|---|---|
| 1 | Lista | Lista | 2 cargas | Acorazado |
| 2 | Recarga | Lista | 2 cargas | Crucero |
| 3 | Recarga | Recarga | 2 cargas | Fragata |
| 4 | Lista | Lista | 1 carga | Acorazado |
| 5 | Recarga | Lista | 2 cargas | Crucero |
| 6 | Recarga | Recarga | 2 cargas | Fragata |
Small ships always fire. Big ones have charges and a recharge time:
- Firing spends 1 charge and starts the recharge timer.
- At the start of EACH of your turns the timer drops by 1; at 0 you regain a charge.
- A damaged ship recharges all the same; it only stops if it sinks.
Each ship card (in Board & ships) shows its charges and recharge.
| Turn | Battleship | Cruiser | Frigate | Fires |
|---|---|---|---|---|
| 1 | Ready | Ready | 2 charges | Battleship |
| 2 | Recharging | Ready | 2 charges | Cruiser |
| 3 | Recharging | Recharging | 2 charges | Frigate |
| 4 | Ready | Ready | 1 charge | Battleship |
| 5 | Recharging | Ready | 2 charges | Cruiser |
| 6 | Recharging | Recharging | 2 charges | Frigate |
 Marcas de disparoShot marks
Cada disparo deja una marca en la casilla. Aprende a leerlas: son toda tu información sobre la flota enemiga.
No se puede disparar a una casilla ya revelada como vacío, a una nave que ya destruiste ni a una casilla destruida.
| Marca | Qué significa |
|---|---|
| Vacío | No había nada. Con el Explorador, la casilla muestra un número de sonar. |
| Impacto | Diste a una nave. La casilla sigue viva y su mini-barra indica el HP que le queda. |
| Destruida | Esa casilla murió: ya no se puede atacar. El resto de la nave sigue en juego. |
| Derribada | Todas las casillas de la nave cayeron: se revela entera y sus casillas contiguas se marcan como vacío. |
Every shot leaves a mark on the square. Learn to read them: they're all your information about the enemy fleet.
You can't fire at a square already revealed as void, at a ship you already destroyed or at a destroyed square.
| Mark | What it means |
|---|---|
| Void | Nothing was there. With the Scout, the square shows a sonar number. |
| Hit | You struck a ship. The square is alive and its mini-bar shows its remaining HP. |
| Destroyed | That square died: it can't be attacked again. The rest of the ship stays in play. |
| Shot down | Every square of the ship fell: it is revealed and the squares touching it are marked as void. |
 SonarSonar
Cuando el Explorador dispara y cae en vacío, la casilla muestra un número: cuántas casillas de nave vivas hay en sus 8 vecinas (las 4 laterales y las 4 diagonales).
- Un 0 descarta hasta 8 casillas de golpe.
- Un número mayor te dice que hay naves pegadas: busca alrededor.
- El enemigo también tiene sonar si lleva Explorador.
When the Scout fires and the shot lands in the void, the square shows a number: how many living ship squares are in its 8 neighbours (the 4 sides and the 4 diagonals).
- A 0 rules out up to 8 squares at once.
- A higher number tells you ships are close: search around.
- The enemy has sonar too if it carries an Scout.
 Tablero y tamaños por sectorBoard and sector sizes
El tablero es vertical: columnas A–H (izquierda a derecha) y filas 1–12 (arriba a abajo). Una casilla se nombra con ambas, por ejemplo C5.
El tamaño crece con el sector: empieza en 6×8 y llega a 8×12 (96 casillas).
- Tu flota vive en tu campo y la enemiga en el suyo; cada bando solo ve su propio campo completo.
- La barra de cada bando suma el HP vivo de su flota: si la tuya llega a 0, pierdes.
- Hay dos vistas, por casilla y por diseño de nave: alterna con el botón del HUD.
| Sectores | Columnas | Filas | Casillas |
|---|---|---|---|
| 1–15 | 6 | 8 | 48 |
| 16–19 | 6 | 9 | 54 |
| 20–30 | 7 | 9 | 63 |
| 31–44 | 7 | 10 | 70 |
| 45 | 8 | 10 | 80 |
| 46–60 | 8 | 11 | 88 |
| 61+ | 8 | 12 | 96 |
The board is vertical: columns A–H (left to right) and rows 1–12 (top to bottom). A square is named with both, e.g. C5.
The size grows with the sector: it starts at 6×8 and reaches 8×12 (96 squares).
- Your fleet lives on your field and the enemy's on theirs; each side only sees its own field in full.
- Each side's bar sums the living HP of its fleet: if yours reaches 0, you lose.
- There are two views, by square and by ship design: toggle with the HUD button.
| Sectors | Columns | Rows | Squares |
|---|---|---|---|
| 1–15 | 6 | 8 | 48 |
| 16–19 | 6 | 9 | 54 |
| 20–30 | 7 | 9 | 63 |
| 31–44 | 7 | 10 | 70 |
| 45 | 8 | 10 | 80 |
| 46–60 | 8 | 11 | 88 |
| 61+ | 8 | 12 | 96 |
 Clases de nave y HPShip classes and HP
Cada nave tiene un tamaño (casillas que ocupa), HP, daño, cargas y un coste. Las grandes pegan más pero son un blanco más fácil y recargan despacio.
- Explorador y Corbeta: siempre disponibles. El Explorador trae sonar.
- Fragata, Crucero y Acorazado: cargas y recarga; son tu daño pesado.
- Naves de apoyo (Interceptor, Señuelo, Sonda, Artillero): se desbloquean con el avance y traen un rasgo único.
Each ship has a size (squares it takes), HP, damage, charges and a cost. Big ships hit harder but are easier targets and recharge slowly.
- Scout and Corvette: always available. The Scout brings sonar.
- Frigate, Cruiser and Battleship: charges and recharge; they're your heavy damage.
- Support ships (Interceptor, Decoy, Probe, Gunner): unlocked as you advance, each with a unique trait.
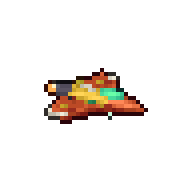
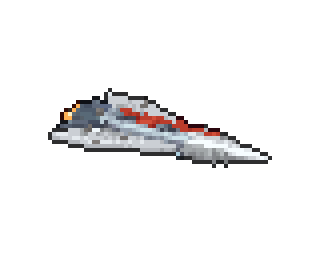
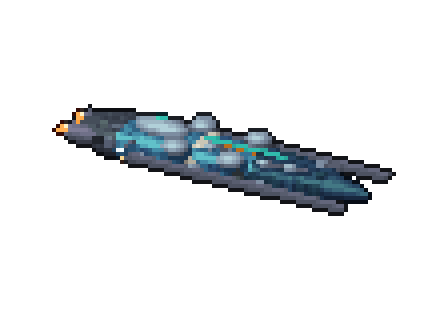
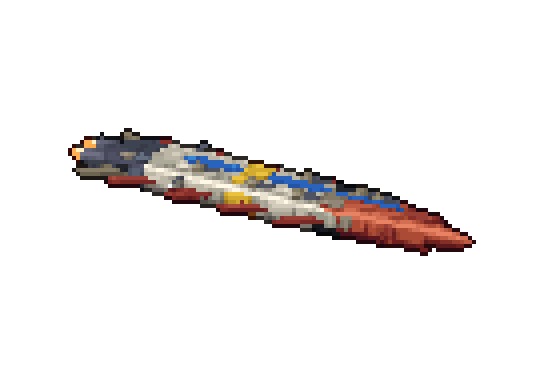
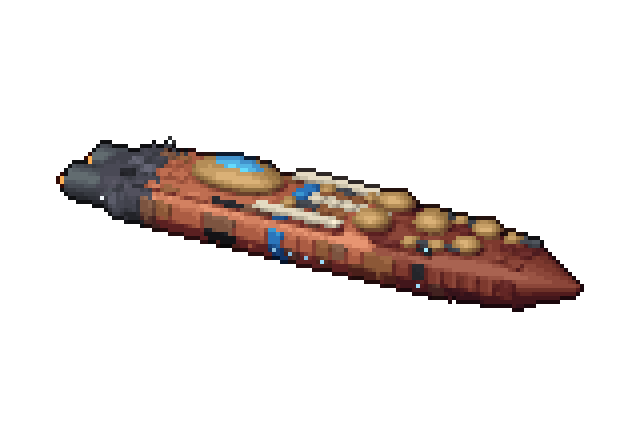
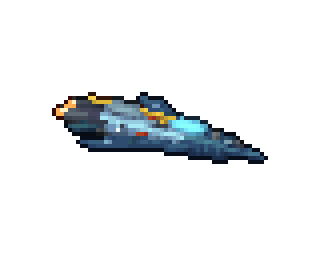
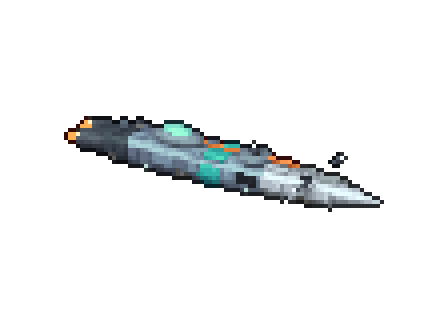
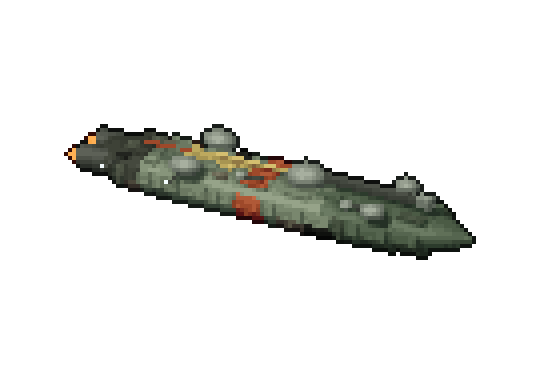
| NaveShip | TamañoSize | HP | DañoDmg | CargasCharges | RecargaRecharge | CosteCost | DesbloqueoUnlock |
|---|---|---|---|---|---|---|---|
| ExploradorScout | 1 | 2 | 1 | 1 | Sin recargaNo recharge | 20 | Desde el inicioFrom the start |
| CorbetaCorvette | 2 | 5 | 1 | 1 | Sin recargaNo recharge | 40 | Desde el inicioFrom the start |
| FragataFrigate | 3 | 8 | 2 | 2 | 2 turnos2 turns | 70 | Desde el inicioFrom the start |
| CruceroCruiser | 4 | 12 | 3 | 1 | 2 turnos2 turns | 110 | Desde el inicioFrom the start |
| AcorazadoBattleship | 5 | 16 | 5 | 1 | 3 turnos3 turns | 160 | Desde el inicioFrom the start |
| InterceptorInterceptor | 2 | 4 | 1 | 1 | Sin recargaNo recharge | 60 | Sector 25Sector 25 |
| SeñueloDecoy | 1 | 1 | 0 | 0 | Sin recargaNo recharge | 30 | Sector 30Sector 30 |
| SondaProbe | 3 | 6 | 1 | 1 | 8 turnos8 turns | 60 | Sector 45Sector 45 |
| ArtilleroGunner | 4 | 11 | 2 | 1 | 2 turnos2 turns | 120 | Sector 65Sector 65 |
El HP de una nave se reparte por casillas al desplegarla, en enteros y con el resto hacia la proa. Un Acorazado de 16 HP en 5 casillas reparte [4, 3, 3, 3, 3].
- Cada casilla muestra una mini-barra con su HP restante.
- Una casilla a 0 queda destruida y deja de poder recibir disparos.
- La nave se hunde cuando todas sus casillas están destruidas.
- La barra general del bando es la suma del HP vivo de todas sus naves.
A ship's HP is split across its squares on deployment, in integers with the remainder going to the bow. A 16 HP Battleship over 5 squares splits as [4, 3, 3, 3, 3].
- Each square shows a mini-bar with its remaining HP.
- A square at 0 is destroyed and can no longer be hit.
- The ship sinks when all its squares are destroyed.
- A side's overall bar is the sum of the living HP of all its ships.
 ColocaciónPlacement
Al desplegar colocas cada nave en línea recta (horizontal o vertical) dentro del tablero.
- Las naves no pueden tocarse de lado (ortogonal), ni las tuyas ni las enemigas.
- Sí pueden tocarse en diagonal.
- El botón «Auto» te propone una formación válida al instante.
At deployment you place each ship in a straight line (horizontal or vertical) inside the board.
- Ships can't touch sideways (orthogonally), neither yours nor the enemy's.
- They may touch diagonally.
- The «Auto» button suggests a valid formation instantly.
 ArmasWeapons
El disparo normal es gratis e ilimitado. El resto de armas son munición que compras en el hangar:
- Cada disparo con arma gasta 1 unidad (acierte o no) además de la carga normal de la nave.
- Un arma multiplica el daño base de la nave que la porta.
- Tu munición pasa de un nivel al siguiente; no se vende ni se reembolsa.
- Cada nave solo puede portar ciertas armas.
The normal shot is free and unlimited. The other weapons are ammo you buy in the hangar:
- Each weapon shot spends 1 unit (hit or miss) on top of the ship's normal charge.
- A weapon multiplies the base damage of the ship carrying it.
- Your ammo carries over from level to level; it can't be sold or refunded.
- Each ship can only carry certain weapons.








| ArmaWeapon | Mult.Mult. | PatrónPattern | Precio paquetePack price | Máx./visitaMax/visit | InventarioStock | DesbloqueoUnlock |
|---|---|---|---|---|---|---|
| Disparo normalNormal shot | ×1 | 1 casilla1 square | GratisFree | ∞ | ∞ | Desde el inicioFrom the start |
| MisilMissile | ×2 | 1 casilla1 square | 10 | 3 | 10 | Desde el inicioFrom the start |
| BombaBomb | ×3 | 1 casilla1 square | 10 | 3 | 6 | Desde el inicioFrom the start |
| Súper bombaSuper bomb | ×4 | 1 casilla1 square | 20 | 1 | 3 | Desde el inicioFrom the start |
| BengalaFlare | — | Zona 3×33×3 area | 20 | 2 | 4 | Sector 15Sector 15 |
| Pulso EMPEMP pulse | — | 1 casilla1 square | 10 | 2 | 4 | Con el medallón del sector 40With the sector 40 boss medal |
| TorpedoTorpedo | ×1 | 2 casillas en línea2 squares in a line | 10 | 2 | 5 | Sector 50Sector 50 |
| LáserLaser | ×2 | 2 casillas en línea2 squares in a line | 20 | 1 | 3 | Con el medallón del sector 60With the sector 60 boss medal |
Algunas armas no son solo «más daño»: cambian cómo juegas.
| Arma | Efecto |
|---|---|
| Bengala | Revela una zona de 3×3 casillas. No hace daño. |
| Pulso EMP | Inutiliza la nave que alcanza hasta el final de la batalla. No hace daño. |
| Torpedo | Golpea 2 casillas en línea, en la dirección que elijas. |
| Láser | Golpea 2 casillas en línea: la primera con su multiplicador y la segunda con daño normal. |
| Bomba y Súper bomba | Sin efecto extra: solo multiplican mucho el daño. |
Some weapons aren't just «more damage»: they change how you play.
| Weapon | Effect |
|---|---|
| Flare | Reveals a 3×3 area. Deals no damage. |
| EMP Pulse | Disables the ship it hits until the end of the battle. Deals no damage. |
| Torpedo | Hits 2 squares in a line, in the direction you choose. |
| Laser | Hits 2 squares in a line: the first with its multiplier, the second with plain damage. |
| Bomb & Super Bomb | No extra effect: they just multiply damage a lot. |
Las armas se compran en el hangar, entre niveles, en paquetes.
- Hay un máximo por visita y un máximo de inventario por arma.
- Si te quedas sin un arma, se atenúa en el selector de batalla.
- Si pierdes un intento, las armas que gastaste en él se pierden.
Weapons are bought in the hangar, between levels, in packs.
- There is a per-visit limit and a stock cap for each weapon.
- If you run out of a weapon it goes dim in the battle selector.
- If you lose an attempt, the weapons you spent in it are gone.
 HangarHangar
El hangar es la tienda y el taller entre niveles.
- Naves: las compras una vez y son permanentes; cada clase tiene un tope de copias.
- Armas: munición consumible, en paquetes.
- Reparación: desde el sector 11 las naves destruidas se desgastan (integridad máx. 3). Repararlas cuesta créditos según su clase.
- Reconstrucción: una nave destruida se recompra con 20 % de descuento.
- Eliminar: en «Mis naves» puedes quitar una nave para siempre (sin reembolso; la flota inicial no se puede eliminar).
- Experiencia: tus naves ganan XP y suben de nivel (máx. 5).
- Abre el hangar desde el mapa estelar.
- Toca una nave o un arma: verás su ficha y su coste.
- Pulsa «Comprar» y confirma. Los créditos se descuentan al instante.
- Revisa tu flota: repara o reconstruye lo que haga falta.
- Pulsa jugar y despliega.
The hangar is the shop and workshop between levels.
- Ships: bought once and permanent; each class has a copy cap.
- Weapons: consumable ammo, in packs.
- Repairs: from sector 11 destroyed ships wear down (max integrity 3). Repairing costs credits depending on class.
- Rebuilding: a destroyed ship can be bought again at 20% off.
- Discard: in «My ships» you can remove a ship for good (no refund; the starting fleet can't be discarded).
- Experience: your ships earn XP and level up (max 5).
- Open the hangar from the star map.
- Tap a ship or a weapon: you'll see its card and cost.
- Press «Buy» and confirm. Credits are deducted instantly.
- Check your fleet: repair or rebuild what's needed.
- Press play and deploy.
 Créditos y recompensasCredits and rewards
Los créditos son la moneda del hangar. Empiezas con 50 y una flota gratuita (Explorador y Corbeta).
| Fuente | Créditos | Cuándo |
|---|---|---|
| Victoria | 10 | Cada vez que superas un sector por primera vez |
| Bono de salud | 5 | Primera victoria con la flota al 80 % de HP o más |
| Objetivos | 3 c/u | Cada objetivo del sector, la primera vez que lo cumples |
| Racha | 5 | Cada 3 victorias seguidas a la primera |
| Botín de jefe | 25 | Al vencer a un jefe por primera vez |
Credits are the hangar's currency. You start with 50 and a free fleet (Scout and Corvette).
| Source | Credits | When |
|---|---|---|
| Victory | 10 | Each time you clear a sector for the first time |
| Health bonus | 5 | First win with the fleet at 80% HP or more |
| Objectives | 3 each | Each sector objective, the first time you complete it |
| Streak | 5 | Every 3 wins in a row on the first try |
| Boss loot | 25 | On beating a boss for the first time |
 Anuncios y créditos retenidosAds and held credits
La versión gratuita se financia con anuncios de Google AdMob. Ninguno cae dentro de un turno: ni el despliegue ni el combate se interrumpen.
- Banda de anuncio: en el menú, el mapa, el hangar, el resultado y los ajustes. En el despliegue y en Versus no hay banda.
- Anuncio a pantalla completa: al empezar una batalla de campaña, y al salir del resultado cuando pierdes o abandonas. Si ganas esa batalla, no llega un segundo anuncio.
- Créditos retenidos: al ganar una batalla de campaña, una parte de los créditos queda retenida y se ve en la línea «Economía» del resultado. No se pierde: se acumula entre batallas y un vídeo voluntario la devuelve entera.
The free edition is funded by Google AdMob ads. None of them falls inside a turn: neither deployment nor combat is interrupted.
- Ad band: in the menu, the map, the hangar, the result and settings. Deployment and Versus have no band.
- Full-screen ad: when a campaign battle starts, and when you leave the result screen after losing or abandoning. Winning that battle doesn't bring a second ad.
- Held credits: when you win a campaign battle, part of the credits is held back and shown on the «Economy» line of the result. It isn't lost: it piles up between battles and a voluntary video returns all of it.
 Gratis vs Versión PremiumFree vs Premium edition
Los 100 sectores de la campaña se juegan completos en la versión gratuita: no hay sectores bloqueados ni contenido recortado. La Versión Premium es una compra única que quita los anuncios y abre el contenido opcional.
El precio lo fija Google Play y aparece en la pantalla de compra; no está escrito en el juego.
| Gratis | Versión Premium |
|---|---|
| Anuncios: banda, pantalla completa y créditos retenidos | Sin anuncios y sin créditos retenidos |
| Campaña: los 100 sectores, completos | Los 100 sectores, completos |
| Maestro: cerrado | Maestro disponible (además hay que liberar el Cúmulo o haber ganado un sector en Maestro) |
| Arcade: solo Cadete y Veterano, sin modo infinito | Arcade completo: todos los tiers y modo infinito |
| Versus: puedes unirte a una partida, no alojarla | Puedes alojar partidas de Versus |
| Naves artillero y sonda bloqueadas | Todas las naves |
| Armas láser y pulso EMP bloqueadas | Todas las armas |
All 100 campaign sectors are playable in full in the free edition: no sectors are locked and no content is cut. The Premium edition is a one-time purchase that removes ads and opens the optional content.
The price is set by Google Play and shown on the purchase screen; it isn't written inside the game.
| Free | Premium edition |
|---|---|
| Ads: band, full screen and held credits | No ads and no held credits |
| Campaign: all 100 sectors, in full | All 100 sectors, in full |
| Master: locked | Master available (you also need to free the Cluster or have won a Master sector) |
| Arcade: Cadet and Veteran only, no endless mode | Full arcade: every tier and endless mode |
| Versus: you can join a match, not host one | You can host Versus matches |
| Ships artillero and sonda locked | Every ship |
| Weapons laser and EMP pulse locked | Every weapon |
 Casillas de Mando (CM)Command Slots (CM)
Poseer una nave no basta: para desplegarla debes tener Casillas de Mando (CM) libres. Cada nave ocupa tantas CM como casillas mide su tamaño.
Tus CM crecen con el sector y se detienen en 21. Así, acumular créditos no te deja desplegarlo todo de golpe: tienes que elegir la composición de tu flota.
| Sectores | CM disponibles |
|---|---|
| 1–3 | 6 |
| 4–7 | 7 |
| 8–11 | 8 |
| 12–15 | 9 |
| 24–27 | 12 |
| 48–51 | 18 |
| 60+ | 21 |
Owning a ship isn't enough: to deploy it you need free Command Slots (CM). Each ship takes as many CM as squares it measures.
Your CM grow with the sector and stop at 21. That way, hoarding credits doesn't let you deploy everything at once: you have to choose your fleet composition.
| Sectors | CM available |
|---|---|
| 1–3 | 6 |
| 4–7 | 7 |
| 8–11 | 8 |
| 12–15 | 9 |
| 24–27 | 12 |
| 48–51 | 18 |
| 60+ | 21 |
 Objetivos de sectorSector objectives
Cada sector propone 3 objetivos opcionales. Cada uno paga 3 créditos la primera vez que lo cumples (también si rejuegas el sector).
Los objetivos de cada sector se eligen de esta lista, y los límites se endurecen cada 20 sectores:
| Objetivo | En qué consiste |
|---|---|
| Sin pérdidas | Gana perdiendo como mucho N naves |
| Rápido | Gana en pocos turnos propios (según el tamaño del tablero) |
| Sonar | Gana con N o más sonares útiles |
| Sin especiales | Gana sin usar armas especiales |
| Doble hundimiento | Hunde 2 naves con pocos turnos entre ellas |
| Insignia | Gana con tu nave más grande a flote |
Each sector offers 3 optional objectives. Each one pays 3 credits the first time you complete it (also if you replay the sector).
Each sector's objectives are drawn from this list, and the limits tighten every 20 sectors:
| Objective | What it is |
|---|---|
| No losses | Win losing at most N ships |
| Fast | Win in few of your own turns (depends on board size) |
| Sonar | Win with N or more useful sonar shots |
| No specials | Win without using special weapons |
| Double sink | Sink 2 ships with few turns between them |
| Flagship | Win with your largest ship still afloat |
RachasStreaks
Una racha cuenta tus victorias seguidas a la primera. Cada 3 victorias seguidas, la racha paga 5 créditos y la cuenta vuelve a 0.
A streak counts your wins in a row on the first try. Every 3 wins in a row the streak pays 5 credits and the count goes back to 0.
 Sectores y dificultadSectors and difficulty
El Cúmulo es una cadena larga de sectores. Superar uno desbloquea el siguiente; puedes volver a los anteriores desde el mapa estelar.
La dificultad sube poco a poco:
- El tablero crece (de 6×8 a 8×12).
- La flota enemiga suma naves y HP.
- La IA enemiga se vuelve más lista: Recluta, Cadete, Veterano, Comandante, Almirante y Supremo.
- Cada 20 sectores te espera un jefe.
- Dificultad: antes de desplegar cada sector eliges Normal, Difícil o Maestro con el chip junto a las CM (también al rejugar). El juego recuerda la última que usaste. Maestro, además, pide la Versión Premium y haber liberado el Cúmulo (o ganado ya un sector en Maestro). Difícil y Maestro suben el tier de la IA enemiga, traen misiles en todos los sectores y pagan más recompensa; el HP y la flota enemiga no cambian.
The Cluster is a long chain of sectors. Clearing one unlocks the next; you can go back to earlier ones from the star map.
Difficulty rises gradually:
- The board grows (from 6×8 to 8×12).
- The enemy fleet adds ships and HP.
- The enemy AI gets smarter: Recruit, Cadet, Veteran, Commander, Admiral and Supreme.
- A boss waits every 20 sectors.
- Difficulty: before deploying each sector you pick Normal, Hard or Master with the chip next to CM (also when replaying). The game remembers the last one you used. Master also requires the Premium edition and having freed the Cluster (or already won a Master sector). Hard and Master raise the enemy AI tier, bring missiles in every sector and pay more reward; enemy HP and fleet don't change.
Sectores especiales
Special sectors
 ASTEROIDESASTEROIDS
En este sector hay asteroides: casillas que no puedes disparar ni usar para colocar naves. Se ven desde el principio y bloquean a los dos bandos por igual.This sector has asteroids: cells you cannot shoot or use to place ships. They are visible from the start and block both sides equally.
 NEBULOSANEBULA
La nebulosa desactiva el número del sonar: solo sabrás si hay contacto (alguna casilla ocupada cerca) o si está despejado. La Bengala revela casillas sin daño.The nebula turns off the sonar number: you will only know if there is contact (an occupied cell nearby) or if it is clear. The Flare reveals cells without damage.
 TORMENTAION STORM
La tormenta iónica añade un turno de recarga a las naves grandes (tamaño 3 o más). Las pequeñas no cambian.The ion storm adds one turn of recharge to large ships (size 3 or more). Small ones are unchanged.
 CHATARRASCRAPYARD
El campo de chatarra paga un crédito extra por cada nave enemiga destruida, solo la primera vez que ganas el sector.The scrapyard pays one extra credit for each destroyed enemy ship, only the first time you clear the sector.
ESTRELLANEARBY STAR
La estrella cercana quema el sonar de vez en cuando: una de cada tres lecturas sale en blanco, sin número ni contacto.The nearby star burns out the sonar now and then: one in three readings comes up blank, with no number or contact.
 SECTOR COMBINADOCOMBINED SECTOR
Este sector combina dos modificadores a la vez y paga un 50% más de botín la primera vez que lo ganas.This sector combines two modifiers at once and pays 50% more loot the first time you clear it.
Jefes y medallonesBosses and medals
Los cinco comandantes del Eco aparecen en niveles fijos:
- L20: Capitana Marea (Insignia de Escuadrón).
- L40: Cmte. Muralla (Insignia de Línea).
- L60: Capitán Cicatriz (Insignia de Vanguardia).
- L80: Almirante Tormenta (Insignia de Flota).
- L100: Almirante Arka (Medalla Astra).
Vencer a un jefe te da su medallón (aparece en el Álbum) y desbloquea a un piloto si era su jefe asociado: Marea → Lumen, Muralla → Kri, Cicatriz → Orión, Tormenta → Nova.
| Nivel | Jefe | Medallón | Pasiva | Piloto |
|---|---|---|---|---|
| L20 | Capitana Marea | Rompenebulosas | Reparación orbital | Lumen |
| L40 | Cmte. Muralla | Rompebloqueos | Escudo de casco | Kri |
| L60 | Capitán Cicatriz | Cicatrices | Sellado de casco | Orión |
| L80 | Almirante Tormenta | Ojo de la Tormenta | Interferencia | Nova |
| L100 | Almirante Arka | Almirante Supremo | Baliza | — |
The five Echo commanders appear on fixed levels:
- L20: Captain Marea (Squadron Badge).
- L40: Cmdr. Wall (Line Badge).
- L60: Captain Scar (Vanguard Badge).
- L80: Admiral Storm (Fleet Badge).
- L100: Admiral Arka (Astra Medal).
Defeating a boss drops their medal (shown in the Album) and unlocks a pilot when it's their associated boss: Marea → Lumen, Wall → Kri, Scar → Orion, Storm → Nova.
| Level | Boss | Medal | Passive | Pilot |
|---|---|---|---|---|
| L20 | Captain Marea | Nebula-breaker | Orbital repair | Lumen |
| L40 | Cmdr. Muralla | Blockade Breaker | Hull shield | Kri |
| L60 | Captain Cicatriz | Scars | Hull sealing | Orion |
| L80 | Admiral Tormenta | Eye of the Storm | Interference | Nova |
| L100 | Admiral Arka | Supreme Admiral | Beacon | — |
Ajustes, guardado y ÁlbumSettings, saving and Album
El menú de Ajustes te deja modular cuatro cosas:
- Vibración: activar o desactivar la respuesta háptica en disparos e impactos.
- Sonido: volumen general y efectos; la música se controla aparte.
- Velocidad ×2: acelera las animaciones de ataque y los VFX.
- Reducir movimiento: sustituye deslizamientos y sacudidas por fundidos suaves (accesibilidad).
Los cambios se guardan al cerrar el menú.
The Settings menu lets you tune four things:
- Vibration: enable or disable haptic feedback on shots and impacts.
- Sound: master volume and effects; music is controlled separately.
- Speed ×2: speeds up attack animations and VFX.
- Reduce motion: replaces slides and shakes with soft fades (accessibility).
Changes are saved when you close the menu.
Guardado
La partida se guarda automáticamente en tu dispositivo al volver al hangar tras cada nivel. No hay cuenta ni copia en la nube en esta versión.
Saving
Your progress is saved automatically on your device when you return to the hangar after each level. There is no account or cloud backup in this version.
El Álbum guarda todas las escenas de historia que ya viste. Aquí puedes volver a leer los prólogos, los diálogos de los jefes y los registros de los medallones, sin tener que rejugar el nivel.
Las entradas nuevas aparecen con un sello "nuevo". Se ordenan por orden de aparición en la campaña.
The Album stores every story scene you've already seen. Here you can re-read the prologues, boss dialogues and medal logs without replaying the level.
New entries show up with a "new" tag. They're sorted by campaign order.